The walk to the studio is the longest part of the day for most first-timers. Your head is full of questions. Will it hurt? Will my brows look strange afterward? What if I hate the shape? Knowing what the hour or two in the chair actually looks like takes most of that worry away. Here is a clear, step-by-step picture of a microblading appointment NYC clients can expect, from the moment you arrive to the moment you walk out with new brows.
What Happens During a Microblading Appointment?
Think of the session as three parts: talking, designing and doing. Most of your time goes into the first two. The actual stroke work is a smaller slice than people expect, and it only starts once you have approved the shape drawn on your face. A typical visit runs roughly like this: a conversation about what you want, a close look at your skin and brows, a drawn-on preview, pigment selection, and then the strokes themselves, followed by aftercare instructions before you leave. Nothing is rushed past you, and you are free to ask for changes at every step.
How to Prepare for Your Microblading Appointment
Good results begin before you arrive. A little planning keeps your skin calm and your appointment smooth. You do not need to overhaul your routine, just make a handful of sensible choices in the days beforehand.
Choosing a Microblading Artist
Picking the right person is half the battle. Look at healed results on real clients, check their training, and read what past clients say about the experience. If you want a full checklist, our guide on how to choose the best microblading artist in NYC walks through it step by step.
Scheduling a Consultation
Some artists combine the consultation with the treatment, while others prefer a separate meeting first. A separate visit is useful if you are unsure about style or skin type, since you can ask questions without any pressure to go ahead.
Preparing Your Skin and Brows
- Do not wax, tint or thread your brows for a week or so before
- Pause retinol and exfoliating acids near the brow area, if your artist asks
- Stay out of strong sun so skin is not red or peeling
- Skip alcohol the day before, as it can make skin more sensitive
- Tell your artist about medications, so they can advise you properly
Microblading Consultation and Brow Assessment
Your artist begins by listening. A good microblading consultation is part interview, part skin check. They want to know the look you are after, how you do your brows now and what you dislike about them. Then they study your face the way a tailor studies a customer: carefully, from different angles, with an eye for details most people overlook.
Discussing Your Brow Goals
Bring photos of brows you love, and a few you would never want. Be honest about your daily habits too. If you love the gym, swim often or are outdoors a lot, say so, since those habits shape the plan.
Reviewing Your Natural Brow Shape
Your artist checks how your hair grows, where it is thin, how the two brows differ and where your natural arch sits. They are working with what you have, not against it.
Considering Your Skin Type
Oily, dry, sensitive or mature skin each takes pigment differently. This part of the conversation decides which technique will look best and last longest. If your skin runs oily, our guide on microblading for oily skin explains why this step matters so much.
Brow Mapping and Shape Design
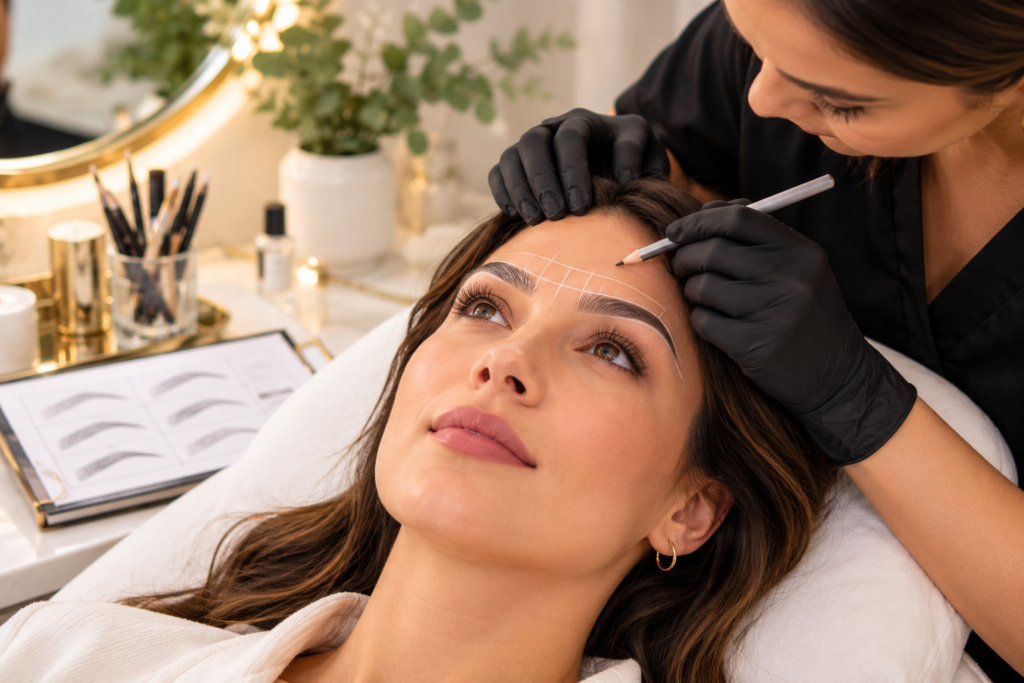
This is the stage most clients enjoy. Before anything permanent happens, your artist draws your new brows onto your face so you can see and judge them. Done well, eyebrow mapping takes the guesswork out of the result. It is also your best chance to speak up if something feels off.
Measuring and Mapping Your Brows
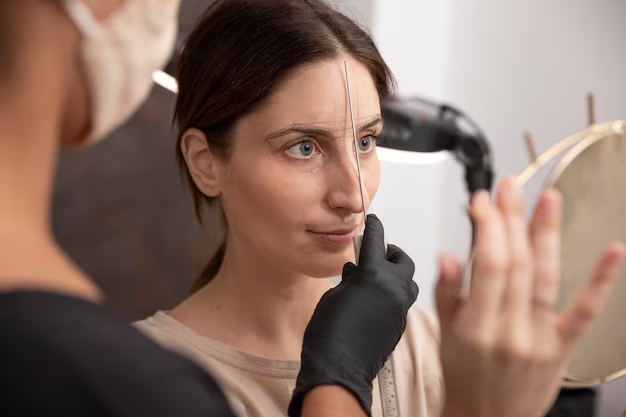
Using a small ruler or thread and a pencil, the artist marks the starting point, the highest point of the arch and the tail. These marks follow your facial proportions, so the final shape looks balanced on you instead of copied from a template.
Choosing a Shape for Your Features
- Rounder faces often suit a slightly lifted arch
- Longer faces tend to look good with a flatter, softer line
- Strong features may call for a gentler brow to balance them
- Your own preference always counts, not just face-shape rules
Reviewing the Brow Design
You get a mirror and a good look. Ask to see it from a distance and in different light. Check that both sides feel even, and do not be shy about asking for a shift here or there. A reasonable artist will adjust until you are happy.
Choosing the Right Microblading Pigment
Color is where small choices make a big difference. Pigment that suits your coloring looks natural for months. The wrong shade can turn warm, ashy or too dark as it heals, so this step deserves a few quiet minutes.
Matching Pigment to Your Skin Tone
Your artist looks at the undertone of your skin, warm or cool, and picks a shade that blends with it. They may mix colors to get a custom match. Pigment often heals a little lighter and softer than it looks on the day, which is also factored in.
Considering Your Natural Brow Hair
- Dark hair can handle deeper, cooler tones
- Light hair usually calls for softer shades
- Greying hair may need a mix to avoid a harsh contrast
- Hair color you plan to change is worth mentioning
The Microblading Process
Once you approve the shape and color, the real work begins. It is quieter than most people imagine. Your artist works slowly and carefully, and you simply rest. The microblading process moves in a clear order, and each part has a purpose.
Preparing the Brow Area
The skin is cleaned, and a numbing cream is applied. It sits for a while so the area is comfortable before any stroke is made. This is a good time to relax, breathe and ask any last questions.
Creating Individual Hair Strokes
With a fine handheld tool, the artist creates thin strokes that follow your natural hair direction. Pigment is worked into each one. The work begins at the front and moves toward the tail, building density gradually. You will feel light scratching or pressure, but not sharp pain.
Checking Symmetry and Final Details
Near the end, your artist steps back, checks both brows together, and refines anything uneven. Expect a final wipe, a quick mirror check and a calm moment to take it in. The brows will look darker and bolder than the finished result, which is normal.
Does a Microblading Appointment Hurt?
Most people describe it as a mild scratching feeling, not real pain. Numbing cream does a lot of the heavy lifting, and good artists top it up during the session if needed. Pain tolerance varies, and some areas of the brow, especially near the tail, can feel more sensitive than others. If you are anxious, tell your artist, since a slower pace and a few breaks can make a real difference. The most common feedback after a session is surprise that it was easier than expected.
How Long Does a Microblading Appointment Take?
Plan for around two to three hours in total, though the strokes themselves take less time than the rest. Most of the visit goes into consultation, mapping and numbing. Here is a rough breakdown.
| Step | Typical time |
| Consultation and goals | 15 to 20 minutes |
| Brow mapping and design | 30 to 40 minutes |
| Numbing | 20 to 30 minutes |
| Stroke work | 45 to 60 minutes |
| Aftercare talk | 10 minutes |
Your own timing can vary, especially if you want changes to the shape or are doing a first session after a past treatment.
What Happens After Your Microblading Appointment?
You leave with new brows, a small aftercare plan and probably a few photos. Your artist will go through what to do next and book your follow-up visit before you go. The first days feel a little tight, and brows will look stronger than you might expect.
What Your Brows May Look Like
- Darker and bolder than the final result
- Slightly swollen or tender in the first day or two
- Defined strokes that look intense before softening
- A bit red around the edges, which fades quickly
Initial Aftercare Instructions
You will likely be told to keep the area clean and dry, avoid picking flakes, skip makeup on the brows and stay away from heat, sweat and swimming for a while. Follow your artist’s exact instructions over any general advice.
What Is the Microblading Healing Process Like?
Healing takes about four to six weeks. Brows go dark in the first days, then flake, then seem to fade, then return to their true shade. This up-and-down pattern is normal, and it often catches people off guard around week two. The strokes are still there, just hiding under new skin. If you want the full day-by-day picture, our microblading aftercare guide covers each stage and what to do during it.
When Is a Microblading Touch Up Needed?
Almost everyone needs one. After healing, some strokes look lighter than planned, and a follow-up visit fixes those spots and finishes the look. Most touch ups are booked four to eight weeks after the first session, once the skin has settled enough to show your real result. After that, a refresh every year or two keeps color crisp, as covered in our guide on how long microblading lasts. If you are ready to see how the whole process feels in person, the team at Visage New York Studio in Manhattan can take you through each step, starting with a relaxed consultation.
Book a Microblading Consultation in NYC
Curious how your own brows will look? Book a consultation, bring your inspiration photos and see your shape drawn on before anything is permanent.