Most people spend weeks choosing a brow shape and about ten minutes thinking about their skin beforehand. That is backwards. The days before your session quietly decide how smoothly it goes, how comfortable you feel and how well the pigment settles. Good microblading preparation is not complicated. It is a handful of small, sensible habits, and once you know them, the appointment itself feels calm instead of nerve-racking.
Why Microblading Preparation Matters
Think of your skin as a canvas that has to be in good shape before the artist starts. Skin that is irritated, sunburned or freshly waxed reacts more strongly to the process, and it can hold pigment unevenly. A little groundwork keeps swelling down, makes the session more comfortable, and gives your artist the cleanest surface to work on. It also protects you from the most common heartbreak: strokes that heal patchy because the skin was not ready. A few quiet preparations beat a lot of corrections later.
How Far in Advance Should You Prepare?
Start about one to two weeks ahead. Some habits, like pausing strong skincare and staying out of harsh sun, need that lead time to make a difference. Others, like skipping alcohol, only matter the day before. If you have an event such as a wedding or a holiday coming up, book well in advance so healing is finished before the big day. Brows look their boldest in the first week, so leave yourself room.
| When | What to focus on |
| 1 to 2 weeks before | Pause strong actives, protect from sun, book consultation |
| 3 to 5 days before | Skip brow grooming, review questions for your artist |
| Day before | Avoid alcohol, rest well, plan a relaxed schedule |
| Day of | Eat a light meal, arrive with a clean, makeup-free brow area |
Microblading Preparation Checklist
A simple checklist keeps nerves in check, because it turns a vague worry into a list of things you can finish. Work through these in order, and by the time you are in the chair, most of the decisions are already behind you.
Choose the Right Microblading Artist
Everything else depends on this choice. Look at healed results, check training and read honest reviews. Our guide on how to choose the best microblading artist in NYC covers what to look for and which warning signs to watch.
Schedule Your Consultation
A short meeting before the session lets you meet the artist, see the studio and ask questions without pressure. It is especially helpful if you are unsure about technique or have sensitive skin.
Discuss Your Brow Shape and Style
- Say what you like about your current brows
- Describe the finish, whether natural, soft or more defined
- Mention your daily makeup habits
- Be open to adjustments, since your face shape guides the design
Share Your Skin Type and Concerns
Oily, dry, sensitive or acne-prone skin each changes the plan. If your skin runs shiny, our article on microblading for oily skin explains why artists adjust technique and pigment. Mention any allergies or reactions too.
Review Your Skincare Routine
Write down what you use on your face, especially anything with retinol, acids or exfoliating ingredients. Your artist can then tell you what to pause and for how long.
What Should You Avoid Before Microblading?
The rule of thumb is simple: keep the brow area calm. Anything that irritates, thins or sensitizes the skin in the weeks leading up can make the session less comfortable and the healing less predictable. The following habits are the usual suspects, and each one is easy to manage once you know about it.
Avoid Brow Treatments
- No waxing, threading, or tinting for a week or so beforehand
- No plucking in the days before, though your artist can guide you on stray hairs
- No brow serums that can irritate or thin the skin
- Leave your brows natural, as your artist wants to see your true growth pattern
Limit Exfoliating and Active Skincare
Retinol, glycolic acid, strong peels, and scrubs all speed up skin turnover and make the skin thinner and more sensitive. Your artist will tell you how long to pause them, and the usual window is about a week or more. Keep other skincare gentle and simple in that time.
Avoid Excessive Sun Exposure
A tan or sunburn on the brow area is a problem. Sunburned skin is tender, and tanned skin can make pigment choice harder. Wear a hat and sunscreen in the run-up, and skip tanning beds entirely.
Plan Exercise and Daily Activities
- Skip an intense workout right before, since heat and sweat make skin more reactive
- Avoid alcohol the day before, which can increase sensitivity
- Limit caffeine that morning if you tend to feel jittery
- Keep the rest of your day light, so you can rest afterward
If you take regular medication or have a medical condition, check with your doctor and tell your artist before booking.
What Should You Bring to Your Appointment?
You do not need much, but a few small items make the visit smoother and help your artist deliver exactly what you have in mind. Arrive early with these ready, and the whole session starts on the right foot.
Inspiration Photos
Bring pictures of brows you love, ideally on faces and hair colors close to yours. Also bring a couple you dislike, since knowing what to avoid is just as useful.
Questions for Your Artist
- How many sessions will I need?
- What will healing look like for my skin?
- What is included in the price, including the touch up?
- How long should I expect results to last?
Keeping questions in your phone notes means nothing slips your mind once you are sitting down.
Previous Brow Treatment Details
If you have had microblading, tattooing or any brow procedure before, share the details. Old pigment can change how new color looks, and your artist needs to plan around it. Mention any past reactions to numbing cream or pigment too.
What Happens During the Microblading Consultation?
The consultation is where preparation meets planning. Your artist listens, studies your face and designs a shape with you before anything permanent happens. We cover this stage in full in our guide on what to expect during a microblading appointment, so here is the short version of what you will actually experience.
Brow and Facial Assessment
Your artist looks at your skin texture, hair growth, symmetry and bone structure. This tells them how pigment will behave and which technique fits you best.
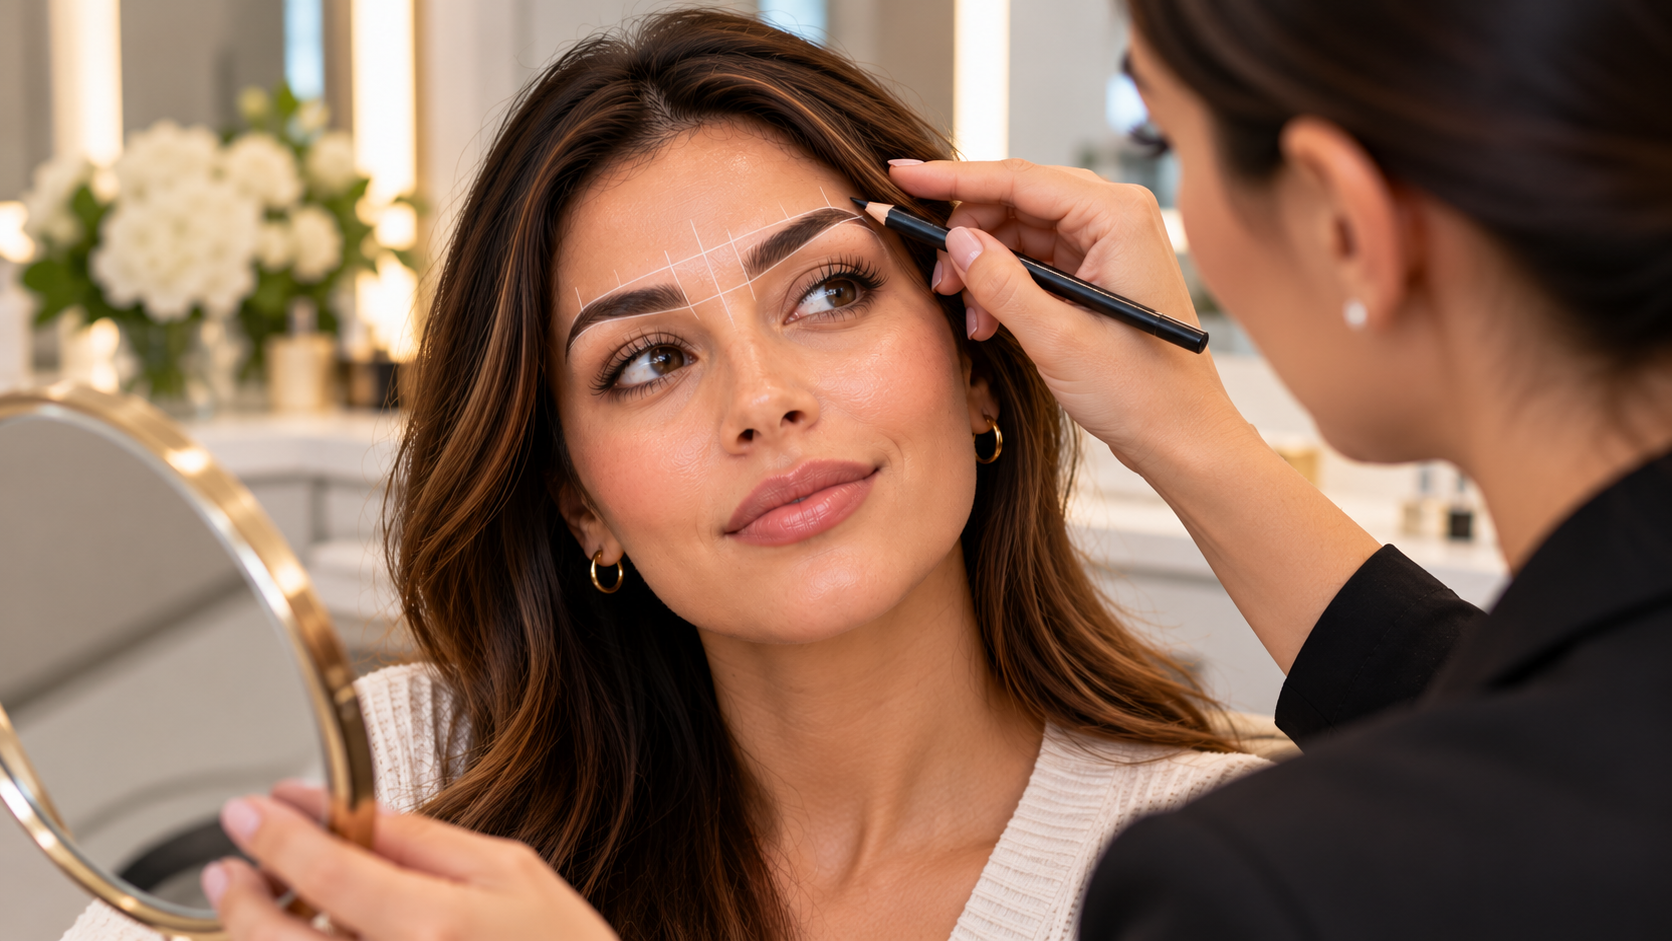
Brow Mapping and Shape Selection
- Measurements mark where your brow should start, peak and end
- A pencil outline lets you preview the shape on your face
- Adjustments are easy to make before any pigment is placed
- Your approval comes first, always
Pigment Selection
Color is chosen to match your skin undertone and natural brow hair, and your artist may blend shades for a custom match. Pigment usually heals softer than it looks at first, so expect a gentle shift.
What to Expect During the Microblading Procedure
Once the shape and color are settled, numbing cream goes on and the strokes begin. You will feel light scratching or pressure, but most people find it far gentler than they expected. The artist works from the front of the brow toward the tail, adding fine strokes in the direction your hair grows. Breaks are fine if you need one, and you can speak up at any moment. By the end, your brows will look darker and bolder than the final result, which is completely normal.
What Happens After Your Microblading Appointment?
You leave with new brows, clear instructions and usually a follow-up booked. The hours that follow are quiet, and the real work shifts to you. Knowing what to expect keeps you from reacting to normal changes.
Initial Brow Appearance
- Darker and bolder than your final color
- Slight tenderness or redness around the brows
- Clear, defined strokes that look intense at first
- Mild swelling, which settles quickly
Aftercare Instructions
Your artist will explain how to clean the area, what to avoid, and when to return. Follow those exact steps, and keep our microblading aftercare guide handy for a day-by-day picture of what each stage looks like.
Preparing for the Healing Period
A little planning helps. Keep your schedule light for the first week, avoid heavy workouts and steam, and skip makeup on the brows. Stock up on a gentle cleanser and a clean cotton pad, so nothing needs a last-minute trip. Healing takes around four to six weeks, so patience is part of the process.
Common Microblading Preparation Mistakes to Avoid
Most mistakes are small, and all of them are avoidable. Knowing them in advance saves you stress and protects your results.
- Waxing or tinting at the last minute, leaving skin irritated
- Using retinol or acids too close to the session
- Getting a sunburn or tan days before
- Skipping the consultation and booking on photos alone
- Not mentioning medications or past treatments
- Booking right before a major event, with no healing time
- Arriving rushed or without a meal, which makes the session harder
Thoughtful preparation turns a nervous first-timer into a relaxed client. Take your time, ask questions, and let your artist guide you. The team at Visage New York Studio in Manhattan is happy to walk you through each step before your session, so you feel ready the moment you sit down.
Book a Microblading Consultation in NYC
Ready to feel prepared instead of nervous? Book a consultation, bring your questions, and walk through every step before your first stroke.